Synfig basics
If you want to make an animation, chances are, you've heard of Flash. It's really cool, but seriously, Flash is expensive. But there's a good free alternative called Synfig that can achieve results similar to those of Flash with relative ease. Here's a basic tutorial to get you started with Synfig, because it's pretty complex if you don't know how to begin.
Here's what we'll be making:

It's not pristine, but it's made to be simple so that it's easier to follow along with the instructions.
1. Download Synfig
Go to the Synfig download page to get a Synfig release for your operating system. Save the setup file and instill it to your computer. Now, go to your start menu or home menu or applications folder and open up Synfig.
That was easy.
2. Getting Started
You've got Synfig open now? Good. It should look like this when you start:
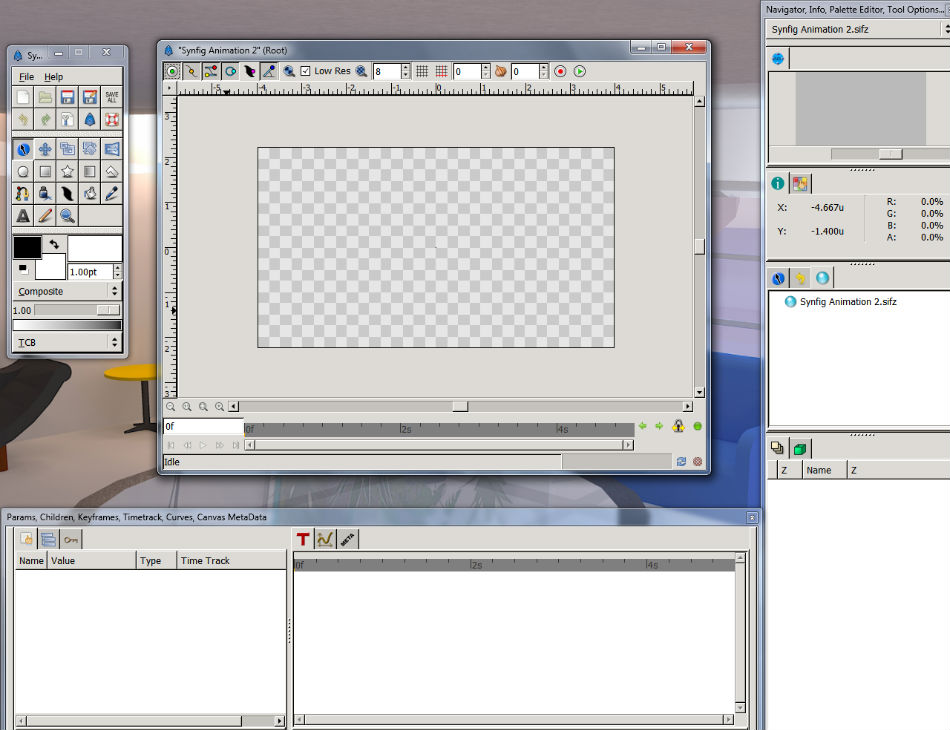
To start, click on the arrow on the top-left of the canvas (in between the two rulers) and select Edit > Properties. Now, a window should pop up with some basic info about your movie, such as the frames per second (under the "time" tab; how many still images per second are played back in your movie), the image size (under the "image" tab; the size of the canvas), and the start and end times (under the "time" tab; leave the start time be, but you can extend/contract the end time.) For our purposes, I'm going to leave everything at the default settings, but for future reference you may wish to change these. Anyway, moving on.
So, first, we'll make a background. Select the gradient tool. 
Next, click on the gradient sample located below the two colors in the toolbox. A menu should pop up with gradient options.
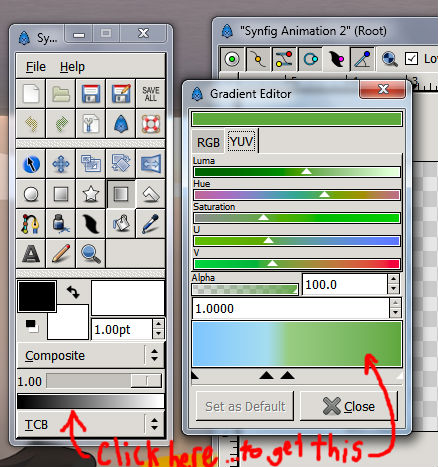
Click on the little arrows along the gradient int he popup and then adjust the sliders to change its color. To add more, right-click along the gradient and select "Insert CPoint". Press "close" when you're done.
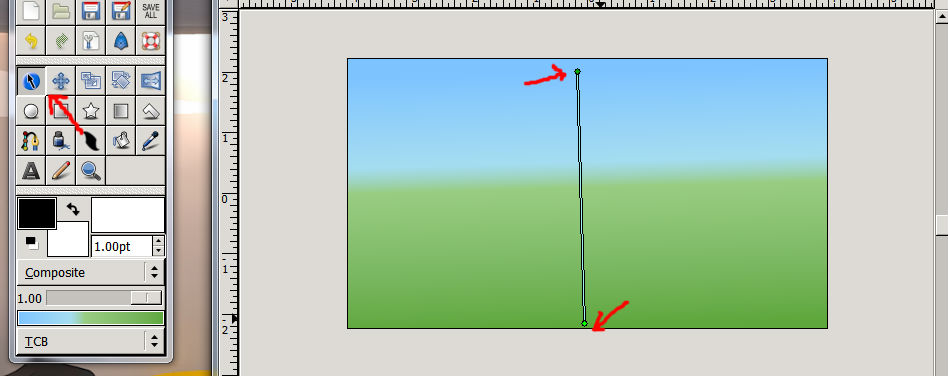
Click and drag across the stage so that you have a rectangle which covers the whole canvas. When you let go, you should have a gradient-filled rectangle. Select the Transform tool. A line with a dot on each end (the dots are called "ducks") should appear on the gradient. Click and drag the ducks so that they are facing up and down so that your gradient it vertical and forms a horizon line.
3. Drawing everything
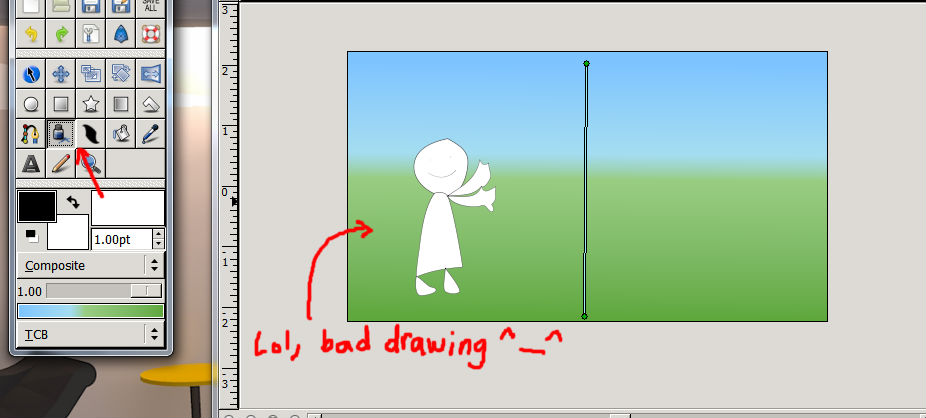
Now, select the Draw Tool. With this, you can click and drag on the canvas to draw things. If you have a tablet and nothing is happening, you may have to go to File > Input Devices, select your tablet from the drop-down menu and change the mode from "disabled" to "screen". Anyway, Draw your guy, draw a basketball, and draw a basketball net. If it helps you, you can use the circle, square or polygon tools too (or maybe use the BLine tool if you're used to using Bézier curves.) Keep in mind that when you draw anything the outline will be the FIRST color on the toolbox and the fill color is the LAST one. You can change the color before you draw something by clicking on the color and using the sliders.
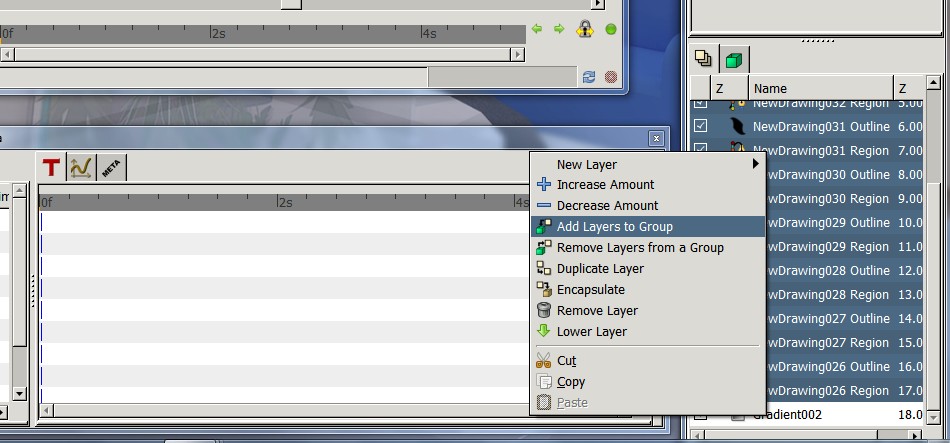
Now, in the Groups Panel in the bottom-right, select all the outlines and regions of your guy (control-click or command-click to select multiple ones) and select "Add Layers to Group." Write "guy" in the pop-up box and hit "ok". Do the same for your ball and then your basketball net (although, call their groups "ball" and "net" instead of "guy".)
4. Animating
If you're not already familiar with the concept, Synfig uses keyframes to do its animation. This means that, on certain frames of your animation, you specify where everything should be, and the computer fills in the movement in between these frames.
In Synfig, to tell the program that you're ready to start keyframing, select the little green circle on the bottom-right of the canvas. If you did it right, a thin red line should appear around the canvas.

Now, select the Smooth Move tool (the four-directional arrow looking thing next to the transform tool.) . This will make all the movement in your movie look a heck of a lot better and less mechanical because it adds ease-ins and ease-outs. Now, go to the timeline panel (the long one at the bottom.) Go to the keyframe tab (the little key icon) and press the plus button. This is the first keyframe. You may now double-click on a group name from the group panel and by selecting all of its ducks (control-a or command-a) and then clicking and dragging any duck you can move it to the starting position. If you need to, you can also go back to the Transform tool to scale/rotate, so long as you go back to the smooth move tool after. When using the transform tool, if you hold CONTROL or ALT, you can rotate or scale instead of move (respectively.) Now, back to the smooth move tool.
On the timeline, click on a time along the line a bit farther down from the start. The timeline scrubber (that thin blue line) should move to that spot. Press the plus button to add another keyframe. Now, by using the smooth move tool, you can reposition the groups to their next key point by selecting all the ducks and clicking and dragging them. You may find that on object with many points, the smooth move tool only skews the points. If you don't want this to happen (and you only wanted to do a geometric translation) you may have to use the transform tool. But keep in mind you can use this skewing thing to your advantage if you select only one duck. You can move individual points around to morph arms moving or something of the like. As you do this, the computer is working to fill in the gaps between the points. After you've done a bunch of keyframes, your window may look like this:
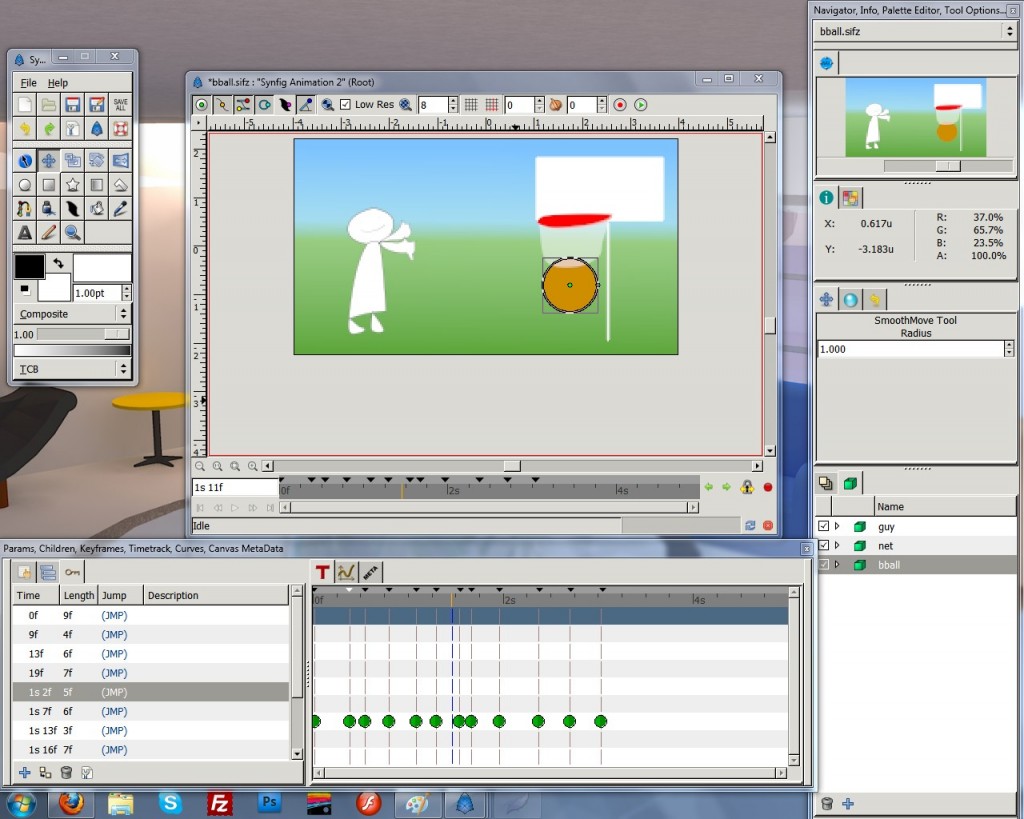
You'll notice I have a lot of keyframes. Well, usually, the more complex the motion, the more keyframes you need.
If you want to preview before exporting, select the preview button on top of the canvas. In the dialogue window, change the frame rate to what you set the frames per second to be in the first step (the default is 24.) Then hit OK.
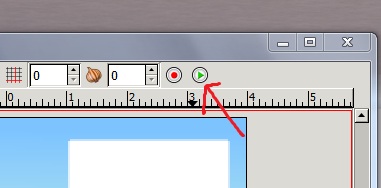
You should have a media player pop up. Once the rendering is finished, you can play your movie with the controls. If you think what you see needs some work, you can close the window and continue animating. If not, close the window anyway and move on to the next step.
5. Exporting and Compiling
Once again, click on the arrow on the top-left of the canvas. Select File > Render. Now you have some options to chose from in terms of what kind of video you want. Click on the dropdown menu and change it from "auto" to the "yuv" one. This will create an mpg movie which you can upload to youtube or something of the like. Click on "change" next to the filename and save it wherever you want and call it whatever you want so long as it ends in .mpg and not the default file extension. You may also chose to export a .gif (you have to choose that option from the dropdown menu and save the file as a .gif). Click "Render" and you're good to go. Just wait for the command line window to finish processing the render before you move on.
Now, since Synfig can't create multiples scenes (to the best of my knowledge - if you know how, please tell me because I'd really like to know), you have to make each scene its own project, export them separately and then use a program like Windows Movie Maker, iMovie, or Kdenlive (which now runs on Mac as well as Linux!) to put them all in order and export them.
...and that's it.
Well, now, hopefully this helped you get started with Synfig if you were having difficulties, or get you interested in wanting to try it if you haven't already :)
</david>