Flood Fill in Blender Grease Pencil
If you asked me in high school what I thought I'd be doing right now at 25, I'd have probably answered that I wanted to be an animator. At the time, I was practising and improving my classical 2D animation skills, and was also just starting to get my hands dirty with Blender, which a friend of mine had learned for 3D animation. After some time, I gave up on that to pursue a career in software development. In recent years, though, things swung back towards animation: in my day job, I now find myself working on animation software, and occasionally doing animation myself (albeit, done generatively through code.) I think my younger self would be thrilled.
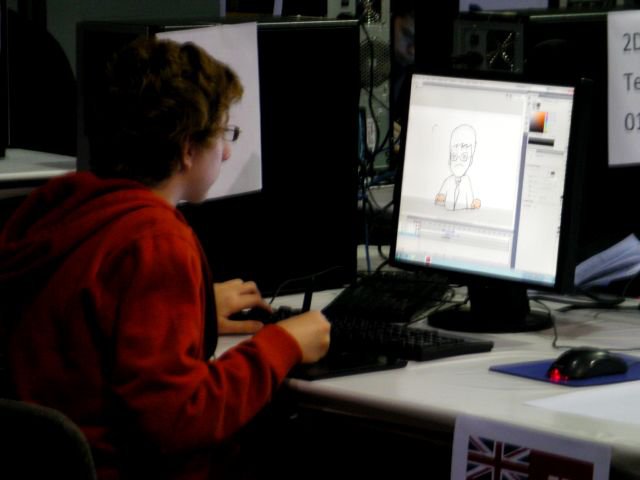
Baby Dave (14 years old?) doing some animation
I still do a little bit of classical 2D animation every once in a while as a hobby. I learned on Flash back in the day, and while it's the software I'm the most productive in, I keep looking for reasons to switch to something open source. This is both for practical financial reasons (this sort of animation is just a hobby, I'd rather not pay a subscription fee), and also because, as a programmer, I just want to support open source projects. The other week, after learning that my old version of Flash wouldn't ever be able to work on my new M1 Mac, I finally decided to try switching to Blender. I'd heard about its Grease Pencil 2D animation environment since 2019 but had never truly tried it for myself.
I was having a great time drawing in Blender! I made this little animation about the time I got Maddy to drink pickle brine by promising that I'd drink some too. (This deal must be pretty compelling; it worked on my sister too.) So far so good, five stars out of five!
However, when it came to filling in the outlines with colour, I was finding that shapes that looked closed were not getting filled by the fill bucket tool. Blender comes with two tools for automatic gap closing when filling—leak size and stroke extensions—but neither seemed reliable enough for my drawings. One can also hold the alt key to draw an invisible line and manually close gaps, but this requires finding the gap that's preventing the fill from working, and it's often not easy to see.
I had the choice of either suffering through the tedious trial-and-error of testing different gap closing techniques for every frame needing to be coloured, or downloading the Blender source code and trying to improve the tools myself. Probably the former would take less time overall, but I'm allergic to doing tedious, repetitive work, so I'd rather take a risk and do the latter. This is one of the best parts of open source, in my opinion: if something bugs you enough, you can just go in and try to solve it yourself.
I mentioned that there are two types of automatic gap closing currently in Blender. After finding where they live in the codebase, I went through each one, tried to understand them, and tried to see how they might be affecting my drawings.
Leak size
The first one I looked at takes place in bitmap space: the leak size parameter. For context, when you select the fill tool and click somewhere on the canvas, Blender uses a classic flood fill algorithm to discover the shape of the region being filled:
- Render all the strokes to a bitmap
- Create an empty list of pixels that are in the filled region
- Create a queue of pixels to check, starting with the one under the mouse cursor
- While the queue of pixels has items:
- Take the next pixel location out of the queue
- If the pixel has been coloured in by a stroke, do nothing
- Otherwise, add this pixel to the list of filled pixels, and add any yet-unchecked pixels neighbouring the current one to the queue
- Create a new filled shape out of the vectorized the outline of all the filled region pixels
This works as long as the region being filled has no gaps in it: it's like you've got a single pixel brush that you move around the drawing, and it can poke itself through any gap through which it can fit.
Blender's leak size check adapts this algorithm slightly. Instead of stopping only if a pixel has been coloured by a stroke, it also checks pixels plus or minus leak_size pixels away in the x and y axes. If a horizontal and a vertical corner has been coloured, it will stop. Instead of a single pixel moving around, you've got a little plus shape that will poke itself wherever it will fit, as long as under two of its corners hit an edge. Why two? This lets the plus get right up to some edges that it would otherwise not quite reach.
However, an issue with this design is that it doesn't check the pixels between the center of the plus and its corners. This means there are cases where, if leak_size is larger than your stroke width, the plus doesn't get stopped by gaps. Unfortunately this is the scenario I found myself in.
Stroke extension
The other method Blender uses involves extending your strokes by a user-specified distance before doing a fill. The idea is that if your stroke didn't quite reach all the way to connect with another stroke, you can invisibly extend it a little bit before filling so that you end up with a closed region. This algorithm is also fairly straightforward:
- For each stroke in the drawing:
- Calculate the starting tangent of the stroke: normalize(pts[0] - pts[1])
- Create and add an invisible stroke going between the starting point, pts[0], and a point extension_distance away along that tangent
- Calculate the ending tangent of the stroke: normalize(pts[total_points - 1] - pts[total_points - 2])
- Create and add an invisible stroke going between the ending point, pts[total_points - 1], and a point extension_distance away along that tangent
- Apply the flood fill algorithm using the original strokes plus the new invisible strokes as the boundaries
When filling, you can optionally show the extensions in blue before committing to the fill. Here's what it looks like:
This method also works well for most cases, but I noticed my drawings often had strokes that wouldn't work with this method for one of two reasons:
First, sometimes there's a sharp point in the middle of a stroke that needs to get extended in order to connect to another stroke, not at an endpoint.
Second, sometimes there are endpoints that are close together, but whose tangents are nearly parallel, so extending the strokes won't to get them to intersect.
In the videos above, I've reduced the stroke thickness to make it clear what's going on with the strokes. When the strokes are thicker, it can be pretty hard to see what the problem is for either of these two cases, so fixing it can be tough.
Having committed to trying to solve my problem instead of living with a bit of jank, I decided to make some modifications and recompile Blender.
Attempt 1: Leak size without gaps
I started by trying to improve the leak size check in Blender's flood fill algorithm because this seemed like it would be a more general solution than trying to enumerate the different vector-space scenarios where one might need a new kind of stroke extension.
If the core problem is that there are gaps in the plus shape which might miss boundaries, I thought I might try removing those gaps. Instead of just checking the center point and the four corners, I added a for loop through all the pixels between the center and each corner, creating long arms for the plus. If any pixel on any two sides of the plus hits an edge, then the center pixel is not allowed to be filled. As you can see below, this stops the fill from escaping through the gap, but it also introduces artifacts where it can't fill too close to some edges.
Blender also has a feature that lets you grow the size of the filled region after filling, allowing some of those missed pixels to get included again. This worked well enough for me that I was able to finish my animation! Where previously it took me a whole evening to colour in just one character's hair every frame, with this change, I was able to colour everything else in the animation in another evening.
However, this method has too many drawbacks to warrant shipping it. Firstly, as Blender developer Antonio Vazquez pointed out in code review, this change has the potential to be noticeably slower for large leak sizes. Previously, there would always be four additional checks per pixel in the flood fill regardless of size. With this change, if you fill gaps n pixels wide, there are O(n) additional checks per pixel, and there can be lots of pixels.
Moreover, as artist and contributor Aleš Jelovčan pointed out, relying too much on type of gap filling might not be such a great idea, as the visual artifacts get worse the larger a leak size you pick. It would be ideal if we could get something smarter working.
While I was happy to have a custom build of Blender that let me be productive again regardless of whether or not the changes get merged, I was eager to try a different fix. There were a few ideas we bounced around in the review comments that seemed like they could be promising, which lead me to my next solution.
Attempt 2: New types of stroke extensions
Although I am sure that there are other cases where stroke extensions also fail, the vast majority of the cases I ran into were the two I outlined earlier, and we discussed some ideas in code review for how to address them.
Curvature extensions
The first problem was that there are bits that visually look like endpoints, but are actually just sharp points in the middle of strokes. If we can identify these points, then we can add extensions there.
The property that will accomplish this is the radius of curvature. This is the radius of the largest circle that fits snugly in the "armpit" of the curve at a given point. (I can't think of a better non-mathy word than armpit, so I'm going to keep using that, sorry lol.) If you can fit a large circle, then the curve must not be bending too sharply. If you can only fit a tiny circle, then it must be a pretty sharp spot on the curve. We can pick a threshold radius, and if a stroke bends sharply enough to have a radius of curvature below the threshold, then we can add an extension. The threshold we pick will be relative to the stroke thickness: the thicker the stroke is, the bigger a circular bend can be and have it look indistinguishable from an endpoint.
So how do we calculate the curvature? To start off with, strokes in Blender are polylines: a series of points that get connected by straight lines.
The tangent direction going into a point is the vector difference between it and the previous point, normalized so it has a length of 1. This is a vector pointing in the current direction of the curve at that point. Similarly, the tangent going out of a point is the normalized difference between the next point and it.
The curvature vector is the change in tangent direction over distance. This is the vector difference between the tangent going out of a point and the tangent going in, divided by the distance over which this change occurs. The sharper the curve, the longer the vector will be.
It will point towards the armpit of the curve. If you come from a physics background, this is the acceleration of the stroke, similar to how objects undergoing circular motion are constantly accelerating towards the center of the circle.
The length of the curvature vector is the reciprocal of the radius of curvature: the larger the curvature vector, the smaller a circle must be to fit into the armpit.
Using the direction and length of the curvature vector, we can check if 1/length(curvature_vector) is below our radius threshold to see if we should add an extension. If we do add an extension, we will extend in the opposite direction of the curvature vector: we want to extend away from the armpit, not towards it.
Calculating this involves looping over every point in every stroke, but there are typically many fewer of those than there are pixels in a flood fill area, so this is more efficient to calculate than my previous method.
Endpoint connections
The second problem was that some endpoints have parallel tangents but are slightly offset from each other, so their extensions will never connect. To address this, one can connect any two endpoints that are within a given distance, regardless of the angle of their tangents.
This involves comparing the distance from each endpoint to each other endpoint in a drawing. While this still is a significantly smaller number of comparisons than would be present in a flood fill, one can eliminate some extra distance calculations by first checking if the bounding boxes of the two strokes are close enough together that it's even possible for their endpoints to be within the radius we're looking for. We can do this by extending every side of the bounding box by our radius threshold and seeing if the boxes overlap at all. If they do, then we can check the pairs of endpoints, adding connecting lines between them if they're close enough together.
The result
My first attempt allowed me to at least finish my animation, which looks like this:
I hope, following some more code review, my updated changes will get merged in and end up in Blender 3.3! If I told my younger self that there's the possibility that I'd have code in Blender, I think my younger self would be pretty excited. It's a good feeling knowing that I'm now able to do things Baby Dave would approve of!
After that, there are a few other little bugs I want to fix if I get the time, including the fact that Blender's fill vectorization doesn't support closed-in holes; one has to split such shapes into two before filling in order to preserve the hole.
It might also give me an excuse to make more animations, which is always a plus!